QymBudsAir 1.0 TWS Bluetooth — where things stand
Work on QymBuds Air is in full swing, and only the delivery times for new board revisions are dragging the process out. There have already been three trial batches of boards. Right now we have a working alpha version of the wireless earphones with minor flaws. What went wrong and what had to be got past — read on.
The first revision of the boards was designed and ordered for the AB5615a chip, but something went sideways and in the end our friends from China sent me AB5376T chips. As it turns out, that is no reason to be upset. The AB5376T is newer, needs the same simple support circuitry, has everything the AB5615a has and then some. Where the AB5615a supports only the SBC codec, the AB5376T can already work with AAC, which improves the sound. A hunt for datasheets and a parallel conversation with our Chinese partners quickly led me to a second board revision, laid out for the AB5376T.
The long wait for the boards ended, and here is the first sample soldered up and powered on. And in reply — silence. No signs of life whatsoever. The status LEDs do not blink, there is not even noise or a squeak from the driver. Measurements and a look with an oscilloscope showed the power was fine: every voltage that should be there was there, and none where it should not be. The chip was drawing a certain current too. There were even hints of it starting up, but then everything froze. Two evenings went that way, given over to checking and testing everything possible. As often happens, it turned out to be both simple and hard at once: in the documentation I had, the chip pin marked LX was pulled to ground through an inductor. That raised no suspicion, since such circuits do appear where a chip has DC converters, oscillators or filters. But it turned out it had to be pulled up to the internal supply regulator called VDDBT. Once I finally understood what was going on, I cut the ground trace on the board and threw a jumper, pulling the choke to the VDDBT rail. And lo, the chip came alive: the LEDs blinked happily and a voice came out of the driver confirming that the earphone had entered pairing mode with the host.
Next it turned out that while making the changes to the board I had moved the mounting holes, and now this board revision does not fit the cups already prepared. Well then… Everything was measured again, both on the actual board and in the CAD system, and out of that came a new cup (the earphone body).

The shape of the cup keeps getting more complex, and this is far from the final version. But everything needed is already here:
- A seat for the magnetic POGO-pin charging connector.
- A light pipe for the status indication (red, green).
- An opening for the microphone.
- A seat for the function button.
- An opening for the 3.5 mm audio jack.
- Room for the main board and the battery.

The new cup was printed, all the components went into the body, and the earphones were assembled. But I would not be me if I had not, in the rush, mixed up the seat for the 3.5 mm audio jack with a 2.5 mm one. After testing the earphones in that form the main board was reworked: the choke pull-up mistake was fixed, the connector was replaced and the board was made smaller. While I wait for the third board revision, some measurements have already been taken:
Battery life on a 100 mAh cell at around 70% volume (which is very loud — the earphones were clearly audible four metres away) came to 12 hours of continuous playback.
A preliminary frequency response was also taken.

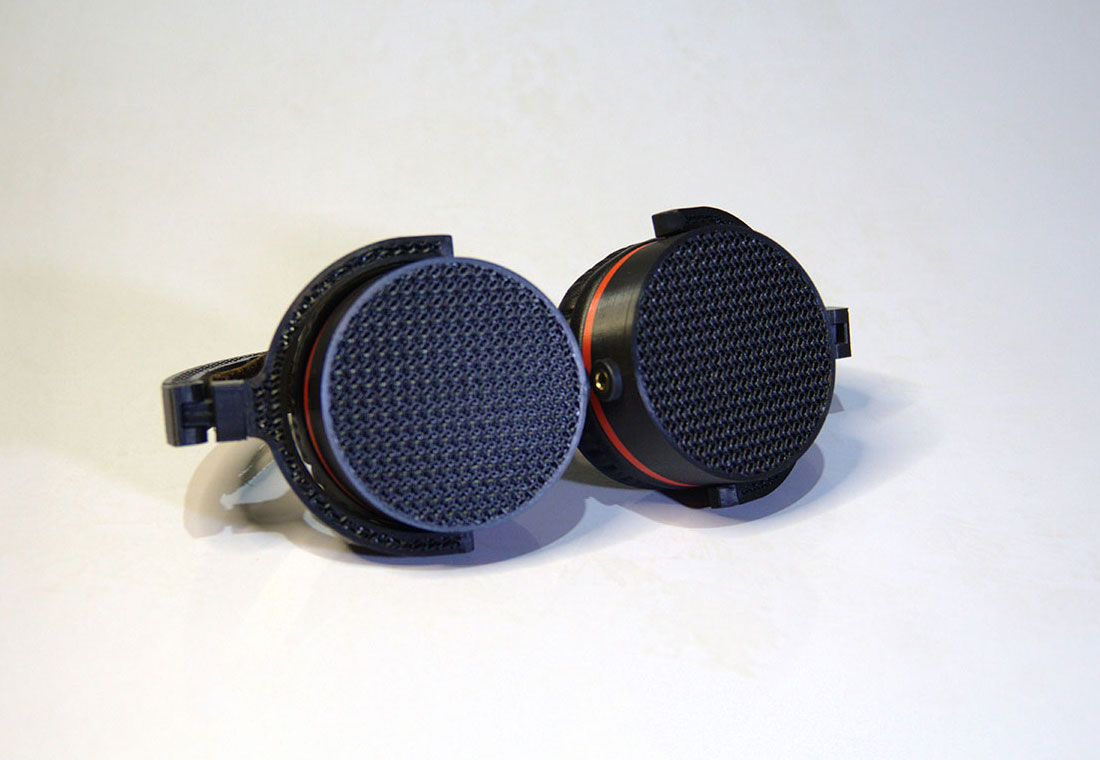
The earphones have been under test for more than a month now and no problems have shown up so far. At the moment an earphone looks like this:

The charging port is on top; on the bottom sit the microphone, the socket for the audio cable and the light pipe for the indicator LEDs.
And what about a release?
There is still plenty of work, in truth. The third board revision has to arrive and be checked for full working order, we have to make sure we can switch between the wired and the wireless connection on the fly, and suitable USB connectors and charging cables have to be picked. There is also battery life during continuous playback to try to improve, a small batch of earphones to assemble and hand out for testing.
Comments (0)
Оставить комментарий
No comments yet. Be the first.